

Building a bike computer from scratch

tl;dr: How hard can drawing a few numbers and a map be? Building a bike computer sent me down a rabbit hole of rendering tricks, stack overflows and displays that remember their pixels.
Modern bike computers are exposed to all elements and have to function under extreme conditions. Whether it's heat, cold or heavy rain, they are expected to perform flawlessly. And they are packed with features too: Route navigation via GPS, lights, tracking your current gear (for electronic groupsets) and lots of athlete sensor data like heart rate, power data (sometimes left + right leg individually), cadence and much more.
Naturally, this piqued my curiosity because all of that has one thing in common: It consumes energy! How efficient can you make that? A bike computer has limited battery and there are cyclists who sometimes ride days through remote areas without power. This must come with crazy optimizations on both the software and hardware level.
Is software enough?
Being a software developer by trade, I jumped straight into prototyping it. My laptop is ridiculously overpowered compared to a micro-controller, but building the software in isolation has the advantage that it keeps costs low. This is the perfect sandbox to try many optimizations in advance.
As web developers we don't think twice about using complex UI structures like the DOM or frameworks like React. On embedded micro-controllers those abstractions have a high price: laggy visuals and high energy consumption. Efficiency is the name of the game!
Think about what a bike computer screen does: You're cruising down a descent at 50-80km/h, 90% of the display remains completely static, like layout, background or labels. You need the most efficient way to update the fewest number of pixels and when only the data values change only these should be updated. Everything in the UI has an initial draw path for when it's first drawn and then a highly optimized function that bypasses as much as possible to only touch changed pixels.
That sounds straightforward until you add overlapping UI like a pause menu. Opening it shouldn't need to draw what's underneath, we should only ever draw what the user can see. In the end you still need some sort of lightweight render tree to do occlusion checking. When a map is fully hidden, this allows us to stop requesting map tiles from storage entirely.
After getting a rough inital demo working I ordered a real but cheap and ready made development board to test it on actual hardware. It fell apart pretty quickly.
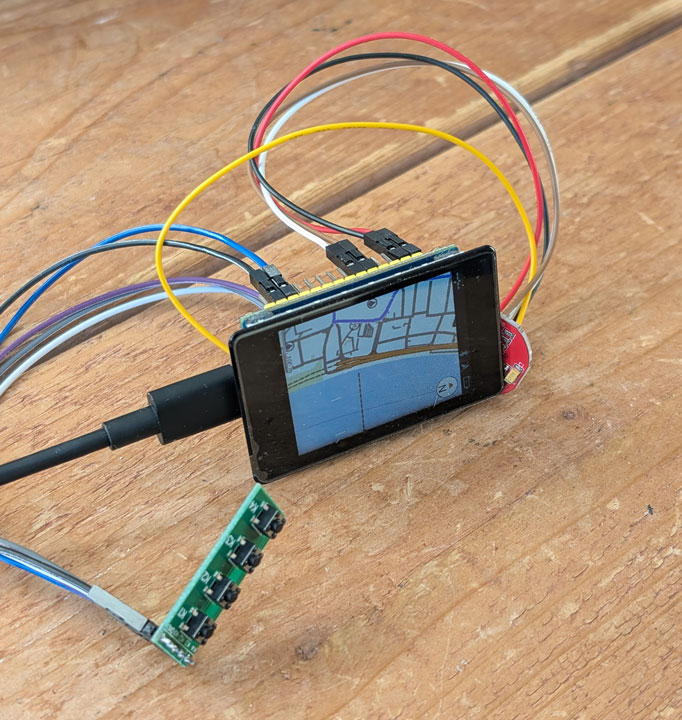
Getting a hardware reality check
Despite best efforts to optimize as much as possible in software, it felt laggy and barely usable. There is limited memory and reading anything from storage through the micro sd card adds significant latency. The CPU has only 2 cores and you need one of them to do sensor processing and input handling already. So really you only got one core and neither is powerful either. Remeber, we're trying to conserve as much energy as possible here!
The biggest issue was rendering the map. The OpenStreetMap data is way too detailed for such a tiny screen. You can't just pre-render the map either, because there simply isn't enough storage on the device. You have to resort to vector rendering. The more detail you render, the slower it gets. So the first course of action is to greatly simplify geometry data. Forests, grass, rivers and the like have tiny bends which often barely occupies a full pixel so you can greatly simplify that. Zooming out should reduce the amount of detail and work for the screen even though it covers a much larger area.
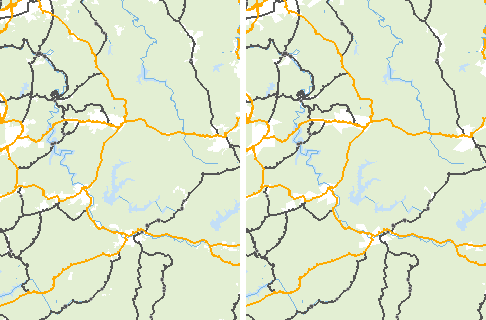
There are opportunities to reuse work at runtime too. Similar to navigation systems in cars the map is usually rotated to match the users point of view. The map changes less frequently than the rider's position so you can introduce some thresholds up to which you can re-use the same pixels and only redraw when the threshold is crossed. With a spatial index for the tiles you can examine only the data that just about covers the screen. And instead of redoing that every frame you keep neighbouring tiles in memory so that you don't have to reach to the slow micro sd all the time.
The board also shares an SPI bus between the display and the sd card which means only one of them can use it at a time. Reading map data from the SD card over SPI blocks pushing frame pixels down the exact same bus, which locks your frame rate to your IO speed. So you're getting bottlenecked by the hardware to some extent as well.
You have to be really meticulous about the cost of producing a frame, the cost of presenting it and the amount of time input can go unattended. Improving one doesn't necessarily improve the others.
Death by a thousand allocations
Stack space and memory had its own surprises as well. Large local buffers and deep function calls quickly ate through the 64kB stack frame, leading to stack exhaustion errors. Anything temporary like arrays cause an allocation and is allocated on the stack by default. Everything is fighting for memory here, because you have to share it with the whole system. You're basically writing an OS together with your app in the same binary. Enabling bluetooth alone, takes up memory to keep track of connections etc. But instead of just increasing stack space, the better move is to reduce temporary allocations alltogether and move more heavy data to the heap.
Optimising startup
When going out the door for a ride the last thing you want to do is wait for a minute for your bike computer to boot. It should be there instantaneously. Ideally you'd have it in standby all the time and as powered down as possible so that it is always ready. Nonetheless, optimizing the cold boot process makes for a much better user experience too.
My first mistake was to put the boot logo on the sd card but that means we can only show it once it's fully initialised. Embedding it directly into the firmware on the processor flash memory itself means that we can show it directly without any further delays.
Then there is the product itself
Just as much thought is needed to make the device usable software-wise in the first place. It's easy to get lost in the software side of things, but none of that helps if you can't read your speed at a glance while riding. Font choice, size and spacing matter a lot on small screens. Even anti-aliasing isn't automatically an improvement for smooth edges. On small text it looks horrendous and turns it into a blurry mess.
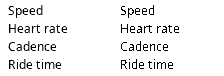
What data do you show and when? How do you show approaching climbs, waypoints, custom notifications etc so that you're not getting distracted while riding? How many button presses does it take to start a ride? There is a surprising amount of UX and product work ingrained in bike computers. These deserve as much attention as the software in my opinion.
Could the hardware be optimized further?
There is more room in hardware optimization too. The development board I used is a generic one meant to allow easy experimentation but it's hardly optimized for a bike computer use case. The board uses a very common ESP32-S3 chip which is an amazing all arounder, but there are low powered efficient ones out there.
Many sensor updates only arrive a few times per second or even less frequently. For microcontrollers this is an eternity. Processing a reading might only take a fraction of time until the next one arrives, which leaves plenty of opportunity to sleep in between. Splitting work across a low powered chip for that and a high powered one for things like map drawing, would likely save a lot of energy. The goal is always to spend as little energy as possible waiting for something to happen. The longer a chip can sleep, the better!
The display accounts for a large share of the energy budget. A typical laptop or desktop LCD shines a backlight through its pixels to produce an image. Even if you're looking at completely static text, that light stays on. Take it outside and you often need to turn up the brightness just to compete with the sun. OLED screens produce light directly in their pixels, but you're still looking at a light-emitting surface. And emitting light drains battery very fast.
For a bike computer, the more ideal display is a Memory-In-Pixel (MIP) display that leverages the incoming ambient light, like sunlight itself, to illuminate the display. It feels more like lookin at paper, somewhat similar to an e-reader. At night you still need some form of illumination but it's much cheaper and can be entirely off during the day.
The key part though is that each pixel has a tiny amount of memory that remembers its current state. The processor doesn't have to keep sending the same image just to keep it visible. Conceptually, it's the same strategy of retained-rendering that we picked for our UI, applied directly on the hardware at the pixel level. The displays keeps showing the same image while the processor sleeps. Maintaining the image still consumes a tiny amount of power, but compared with keeping a backlight on or a processor busy, it can be almost negligible.
A whole other rabbit hole
Designing custom circuit boards is a whole project of its own. Picking efficient components is only a small part of it. You have to make them work together, account for various power consumption and temperature, figure out the board layout and leave yourself a way to debug it. Some of the interesting components are also difficult to obtain without going through the B2B sales channel or buying thousand of units at once.
Although I'm still curious how it all works on the hardware level, this is where I've drawn the line for now. This project has given me a new appreciation for what goes into a device you can strap to your handlebars and forget about while riding. Making something that reliable, takes a surprising amount of thought and care, in both the software and hardware.